 Brown Sugar and Coconut Body Scrub Exfoliates
 Get The Product!
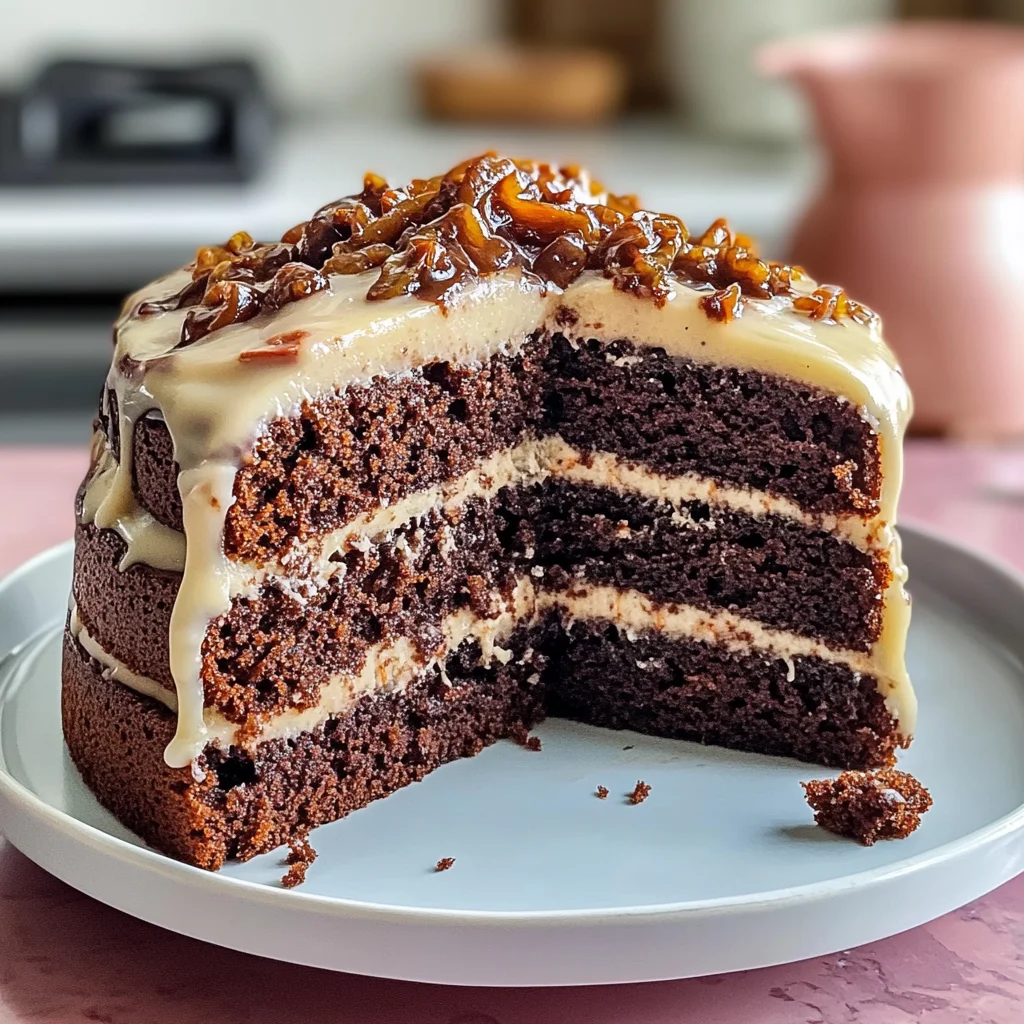
There’s nothing quite like the aroma of warm, freshly baked Maple-Walnut Sticky Buns wafting through your kitchen. The sweet scent mingles with the nuttiness of walnuts, creating an inviting atmosphere that promises a delightful treat.
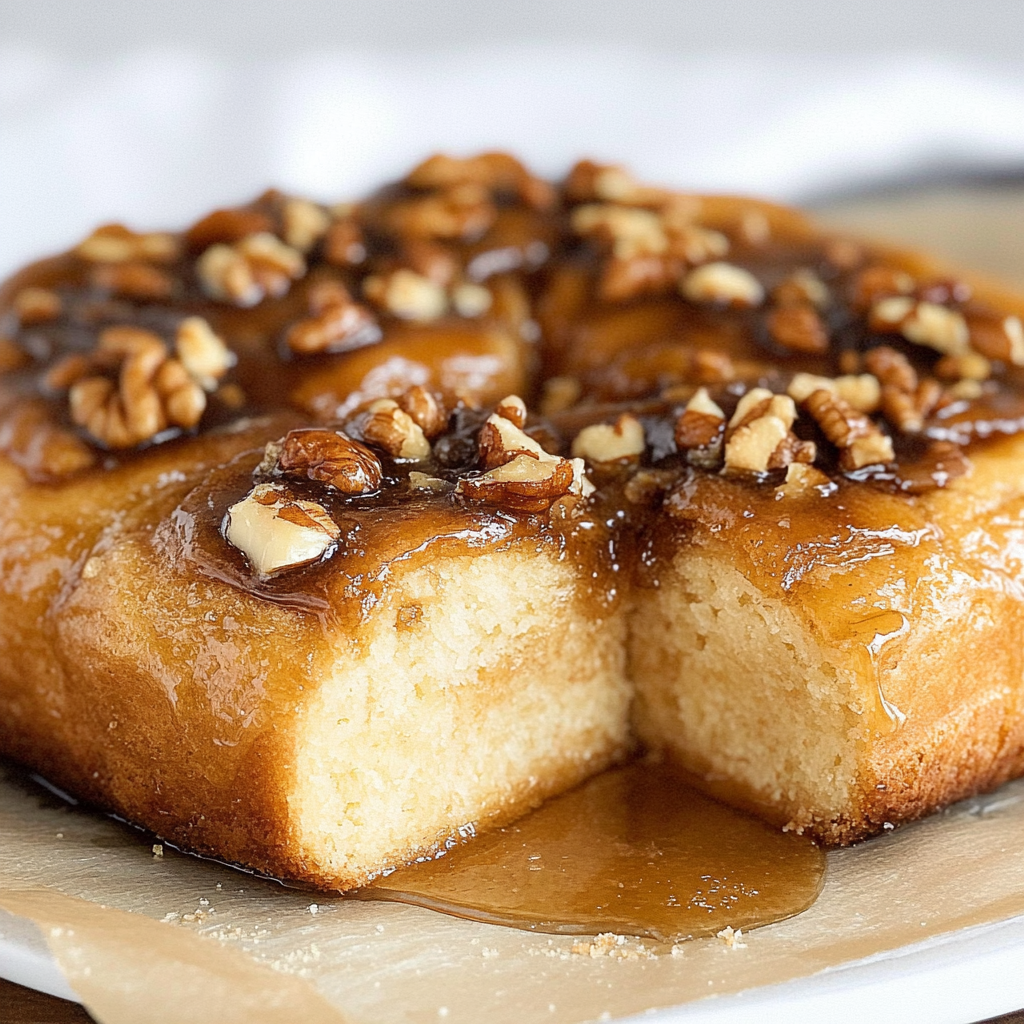
Picture this: You pull a tray out of the oven, and the golden-brown buns glisten with sticky maple syrup. You can almost hear them whispering, “Eat me!” Perfect for lazy Sunday brunches or holiday gatherings, these sticky buns bring smiles and happy bellies to any occasion.
Why You'll Love This Recipe
- These Maple-Walnut Sticky Buns are incredibly easy to make, perfect for both beginners and baking pros
- Their rich flavor profile combines sweetness with a nutty crunch that is simply irresistible
- The visual appeal is off the charts; they look as good as they taste!
- Versatile enough to serve at breakfast or dessert, these buns are sure to impress any crowd
I first made these sticky buns during a family gathering and was met with cheers and applause from my loved ones. It felt like I had won a baking championship right in my own kitchen!
Essential Ingredients
Here’s what you’ll need to make this delicious dish:
-
All-Purpose Flour: Use high-quality flour for a light and fluffy texture in your buns.
-
Active Dry Yeast: Fresh yeast gives the best rise; check expiration dates before using.
-
Warm Milk: Aim for around 110°F (43°C) to activate the yeast properly.
-
Granulated Sugar: This will sweeten your dough while helping it to rise beautifully.
-
Salt: A pinch enhances all other flavors and balances sweetness effectively.
-
Butter: Softened butter adds richness to the dough and creates that melt-in-your-mouth experience.
-
Maple Syrup: Use pure maple syrup for authentic flavor; avoid imitation syrups if possible.
-
Chopped Walnuts: Toasted walnuts add a delightful crunch that pairs perfectly with the sweetness.
-
Cinnamon: This warming spice is essential for that classic sticky bun flavor—don’t skip it!
The full ingredients list, including measurements, is provided in the recipe card directly below.

How to Make Maple-Walnut Sticky Buns
Prepare the Dough: Start by combining warm milk, sugar, and yeast in a bowl. Let it sit until frothy—a sign that your yeast is alive and kicking! In another bowl, mix flour and salt before adding melted butter. Gradually stir in the milk mixture until a soft dough forms.
Knead Like You Mean It: Turn your dough onto a floured surface and knead for about 5-7 minutes until it’s smooth and elastic. It should feel slightly tacky but not overly sticky. Cover it with a clean towel and let it rise in a warm place until doubled in size—about an hour.
Create Your Filling: While your dough is rising, mix together brown sugar, cinnamon, chopped walnuts, and maple syrup in a separate bowl. This mixture will transform your buns from ordinary to extraordinary!
Roll Out the Dough: Once risen, punch down the dough gently (this part feels satisfying). Roll it out into a rectangle about ¼ inch thick on a floured surface. Spread softened butter over the surface before sprinkling your filling evenly.
Shape Your Buns: Starting from one edge of the rectangle, roll up tightly into a log. Cut into 12 equal pieces using dental floss or a sharp knife (trust me, this trick works wonders!). Arrange them cut side up in a greased baking dish.
Bake to Perfection: Preheat your oven to 350°F (175°C). Let your rolled buns rise again for about 30 minutes while you preheat. Bake them for 25-30 minutes until golden brown on top—your kitchen will smell heavenly!
These steps guide you through creating Maple-Walnut Sticky Buns that not only taste divine but also look like something straight out of a bakery window! Enjoy every gooey bite as they melt in your mouth!
You Must Know
- Maple-Walnut Sticky Buns are a delightful treat, combining gooey sweetness with crunchy nuts
- Perfect for brunch or an indulgent breakfast, they elevate ordinary mornings into something extraordinary
- The aroma of warm cinnamon and maple will have everyone rushing to the table
Perfecting the Cooking Process
Start by prepping your dough while your oven preheats; this ensures a smooth baking process and fluffy buns.
Add Your Touch
Consider adding chocolate chips or dried fruits for a twist on the classic Maple-Walnut Sticky Buns recipe, enhancing flavor and texture.
Storing & Reheating
Keep leftover buns in an airtight container at room temperature. Reheat them in the microwave for about 15 seconds to restore their gooey goodness.
Chef's Helpful Tips
- Ensure your butter is softened but not melted for optimal dough consistency
- Avoid over-kneading to prevent tough buns
- Use fresh walnuts for maximum flavor impact in your Maple-Walnut Sticky Buns
One time, I made these sticky buns for my family’s Sunday brunch, and they disappeared within minutes! Everyone raved about them, and I felt like a culinary superstar.
FAQ
Can I use different nuts in Maple-Walnut Sticky Buns?
Absolutely! Pecans or almonds can make a delicious alternative to walnuts.
How do I know when my sticky buns are done baking?
They should be golden brown on top and firm to the touch without sinking.
Can I prepare the dough in advance?
Yes, you can refrigerate the dough overnight before baking for convenience!

Maple-Walnut Sticky Buns
- Total Time: 1 hour
- Yield: Makes 12 sticky buns 1x
Description
Maple-Walnut Sticky Buns are the perfect blend of gooey sweetness and crunchy walnuts, making them an irresistible treat for brunch or dessert. Freshly baked, these golden-brown buns drizzled with pure maple syrup will fill your kitchen with a heavenly aroma. Easy enough for beginners yet impressive enough to wow guests, this recipe ensures delicious results every time. Enjoy them warm and indulge in a delightful experience that elevates any occasion.
Ingredients
- 4 cups all-purpose flour
- 2 tsp active dry yeast
- 1 cup warm milk (110°F/43°C)
- 1/3 cup granulated sugar
- 1 tsp salt
- 1/2 cup unsalted butter, softened
- 1/2 cup pure maple syrup
- 1 cup chopped walnuts (toasted)
- 2 tsp ground cinnamon
Instructions
- In a bowl, mix warm milk, sugar, and yeast; let sit until frothy.
- In another bowl, combine flour and salt; add melted butter. Stir in the milk mixture until a soft dough forms.
- Knead dough on a floured surface for 5-7 minutes until smooth; let rise covered for about an hour.
- Mix brown sugar, cinnamon, walnuts, and maple syrup in a separate bowl.
- Roll out the risen dough into a rectangle; spread butter and sprinkle filling evenly.
- Roll tightly into a log and cut into 12 pieces; arrange in a greased baking dish.
- Let rise again for 30 minutes while preheating oven to 350°F (175°C). Bake for 25-30 minutes until golden.
- Prep Time: 30 minutes
- Cook Time: 30 minutes
- Category: Dessert
- Method: Baking
- Cuisine: American
Nutrition
- Serving Size: 1 sticky bun (85g)
- Calories: 290
- Sugar: 14g
- Sodium: 230mg
- Fat: 10g
- Saturated Fat: 5g
- Unsaturated Fat: 4g
- Trans Fat: 0g
- Carbohydrates: 42g
- Fiber: 1g
- Protein: 5g
- Cholesterol: 20mg